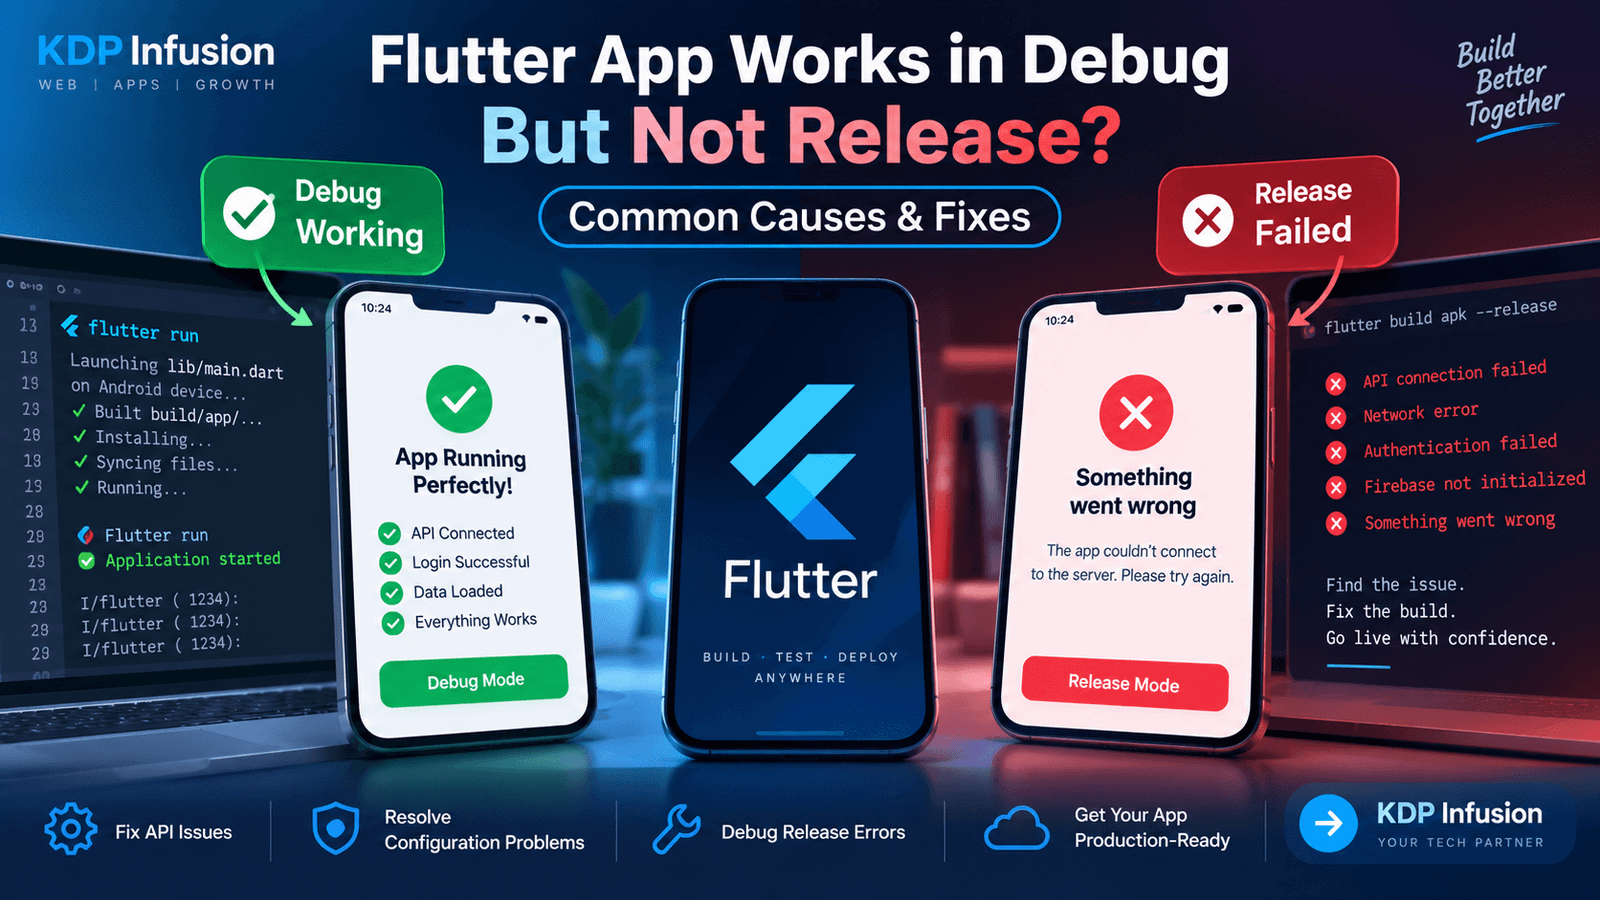
Your Flutter application works perfectly when you run:
flutter runAPI calls work, login succeeds, Firebase connects, images load and navigation behaves normally.
Then you create a release build:
flutter build apk --releaseor:
flutter build appbundleand suddenly something breaks.
The app may open but fail to connect to the API. Login may stop working. Google Sign-In may fail. Firebase notifications may disappear. Images may not load. In some cases, the release build may crash immediately after launch.
This can be confusing because the same Flutter code works correctly in debug mode.
Usually, however, there is a specific difference between your development and production environments. This guide walks through the most common causes and shows how to find the real problem instead of randomly changing your Flutter code.
Why Does a Flutter App Work in Debug but Not Release Mode?
Debug and release builds are not identical.
A debug build is designed for development. It includes debugging support and is generally more forgiving while you’re testing locally.
A release build is optimized for distribution.
The environment can also change:
Debug
Flutter App
   ↓
Development Configuration
   ↓
Local/Test API
   ↓
Debug Firebase / OAuth Configuration
while production may use:
Release
Flutter App
   ↓
Production Configuration
   ↓
HTTPS Production API
   ↓
Release Firebase / OAuth Configuration
That means the problem may not actually be Flutter itself.
It may be caused by Android permissions, API configuration, SSL, environment variables, Firebase setup, signing certificates or release optimization.
The first step is identifying what specifically stops working.
1. Test the Release Build Locally
Don’t wait until the app reaches Google Play before testing release behaviour.
Build a release APK:
flutter build apk --releaseThe APK is normally generated under:
build/app/outputs/flutter-apk/app-release.apkInstall it on a real Android device and test the application.
You can also run Flutter in release mode on a connected supported device:
flutter run --releaseThis helps answer an important question:
Is the problem caused by release mode itself, or does it only happen after distribution through Google Play?
Those are different troubleshooting paths.
2. Check Android Internet Permission
One of the first things to check when APIs work during development but fail in a release Android app is internet permission.
Open:
android/app/src/main/AndroidManifest.xmlMake sure the application has:
<uses-permission android:name="android.permission.INTERNET" />It should be placed inside the <manifest> element, not inside <application>.
For example:
<manifest xmlns:android="http://schemas.android.com/apk/res/android">

    <uses-permission android:name="android.permission.INTERNET" />

    <application
        android:label="My App"
        android:name="${applicationName}"
        android:icon="@mipmap/ic_launcher">

        ...

    </application>
</manifest>
If your app depends on a remote REST API, this is an essential configuration to verify.
3. Check Whether Your API Still Uses localhost
This is an extremely common development mistake.
During development, your API URL might be:
const baseUrl = 'http://localhost:8000/api';But inside an Android application, localhost refers to the Android device itself.
It does not mean your development computer or production server.
You may also have something such as:
const baseUrl = 'http://192.168.1.10:8000/api';That may work while your phone and computer are connected to the same Wi-Fi network.
Once the app is installed somewhere else, that local IP is useless.
Your production build should use your actual production API, for example:
const baseUrl = 'https://api.example.com/api';Before looking for complicated Flutter problems, verify the final API URL being used by the release build.
4. Check HTTP vs HTTPS
Suppose your Flutter application calls:
http://api.example.cominstead of:
https://api.example.comModern Android security policies can restrict cleartext HTTP traffic.
Your debug environment may make the problem less obvious, especially if you have different manifests or development configurations.
For production applications, prefer a properly configured HTTPS API.
Don’t disable Android security globally just to make an insecure production API work unless you have a specific controlled requirement.
5. Check the API SSL Certificate
Using HTTPS isn’t enough if the SSL configuration is invalid.
Test your production API URL directly.
For example:
https://api.example.com/apiLook for:
- Expired certificate
- Invalid certificate chain
- Hostname mismatch
- Incorrect redirects
- Misconfigured intermediate certificate
A browser on your development computer may sometimes hide or handle certificate issues differently from an Android application.
Avoid solving production SSL problems by bypassing certificate validation in your Flutter code.
Fix the server certificate instead.
6. Check Your Environment Configuration
Many Flutter projects use different configurations for development and production.
For example:
const String apiUrl = String.fromEnvironment(
  'API_URL',
  defaultValue: 'https://api.example.com',
);
Then you might build using:
flutter build apk \
  --release \
  --dart-define=API_URL=https://api.example.com
If you forget the --dart-define, your release build may use the wrong value.
Check every environment-specific value
This may include:
- API base URL
- WebSocket URL
- Firebase configuration
- OAuth client IDs
- Payment environment
- Feature flags
- App environment
- CDN URL
Do not assume that because the debug configuration is correct, the release configuration is also correct.
7. Never Store Important Secrets in a Flutter App
A related mistake is putting sensitive server secrets directly into Flutter code.
For example, don’t treat this as secure:
const apiSecret = 'MY_PRIVATE_SERVER_SECRET';A compiled mobile application is distributed to users and should not be considered a secure place for server-side secrets.
Keep sensitive credentials on your backend.
Your Flutter application should normally authenticate with your API using an appropriate user/session/token flow rather than embedding privileged backend secrets.
8. Check Dio or HTTP API Errors Properly
Sometimes the API isn’t “not working.”
The application simply isn’t showing you the actual error.
If you’re using Dio, don’t reduce every exception to:
catch (e) {
  print('Something went wrong');
}
During controlled troubleshooting, inspect useful information such as:
try {
  final response = await dio.get('/profile');
  print(response.data);
} on DioException catch (e) {
  print('Type: ${e.type}');
  print('Message: ${e.message}');
  print('Status: ${e.response?.statusCode}');
  print('Response: ${e.response?.data}');
}
This can distinguish between:
401 Unauthorized403 Forbidden404 Not Found500 Internal Server Errorand an actual connection failure.
That distinction matters.
9. Check Whether Authentication Tokens Are Available
A release-only login problem may actually be a session-storage problem.
Suppose login succeeds and you save a token.
Later:
final token = await storage.read(key: 'auth_token');If the token isn’t available when the next API request is made, the backend may return:
401 UnauthorizedCheck the complete flow:
Login
  ↓
Receive Token
  ↓
Store Token
  ↓
Open Dashboard
  ↓
Read Token
  ↓
Attach Authorization Header
  ↓
Call API
A failure anywhere in this chain can look like “release mode API not working.”
10. Check Your Authorization Header
For token-based APIs, confirm that the release app actually sends the required header.
For example:
options.headers['Authorization'] = 'Bearer $token';Also check your Dio interceptors.
If the interceptor behaves differently because of environment initialization or session timing, your requests may reach production without authentication.
The server logs can be extremely useful here.
11. Check Production API Server Logs
Don’t troubleshoot only from Flutter.
If the release application sends a request to your backend, check the backend logs too.
For Laravel, for example:
storage/logs/laravel.logYour mobile app may show:
Something went wrongwhile Laravel records the actual cause:
Unauthenticated.or:
SQLSTATE...or:
Route not found...Mobile logs tell you what the app sees.
Server logs tell you what the backend sees.
You often need both.
12. Check API Redirects
Production servers sometimes redirect requests.
For example:
http://api.example.com
        ↓
https://api.example.com
or:
https://example.com/api
        ↓
https://www.example.com/api
Authentication headers or request behaviour can be affected by poorly configured redirect chains.
Use the final HTTPS API URL directly wherever possible instead of depending on unnecessary redirects.
13. Check Firebase Configuration
Firebase-related features can work in debug builds and fail in release builds if Android/Firebase configuration is incomplete.
Depending on the Firebase service you’re using, verify:
- Android package name
google-services.json- Firebase Android app
- SHA fingerprints
- Firebase project
- Release signing configuration
The package name registered with Firebase should match the actual Android application.
14. Check SHA-1 and SHA-256 Fingerprints
This is particularly important for services such as Google Sign-In and some Firebase integrations.
Your debug certificate and release certificate have different fingerprints.
You may have configured Firebase using only the debug SHA fingerprint.
Then:
Debug Build → Works
Release Build → Authentication Fails
Get the relevant signing certificate fingerprints and ensure the required release fingerprints are configured with the appropriate service.
After changing Firebase Android configuration, you may also need an updated google-services.json, depending on the change/service involved.
15. Google Sign-In Works in Debug but Not Release
This is one of the classic release-only problems.
If Google Sign-In works during development but fails in the signed application, investigate the signing configuration first.
Check the package name
It must match your configured Android application.
Check the release SHA fingerprints
The certificate signing the distributed application matters.
Check Google Play App Signing
When using Google Play App Signing, the certificate used for builds delivered by Google Play may differ from your local upload key.
That means a locally installed release APK might work while the Play Store version fails—or vice versa.
Check the certificates associated with your Play app and configure the relevant fingerprints with Google/Firebase as required.
16. Check Firebase Cloud Messaging
If push notifications work in debug but not after release, verify more than your Dart notification code.
Check:
- Firebase project
- Package/application ID
- FCM token generation
- Token being sent to your backend
- Notification permission where applicable
- Android notification channel
- Background handler configuration
- Backend sending to the correct token/project
- Release Firebase configuration
Also remember that a reinstall can result in a different registration token.
Your backend should handle token updates properly.
17. Check Android Release Signing
Release applications are signed.
Your signing configuration may affect external integrations that identify your application using its certificate.
Review:
android/app/build.gradleor the equivalent Gradle Kotlin configuration if your project uses it.
Make sure the correct release signing configuration is being used.
Do not commit private keystore passwords or sensitive signing material to a public repository.
18. Check ProGuard and R8
Release builds may use optimization, shrinking or obfuscation depending on your Android configuration.
If a library relies on classes that are removed or renamed unexpectedly, a feature may fail only in release.
If your release configuration enables minification and the problem appears only there, test whether optimization is involved.
For example, inspect your release configuration and plugin documentation for required keep rules.
Don’t solve the problem by permanently disabling all optimization without understanding the cause.
If a dependency requires ProGuard/R8 rules, configure the appropriate rules.
19. Check Tree Shaking and Dynamic Behaviour
Flutter release builds perform optimizations.
Most normal Flutter code handles this automatically, but some packages or patterns involving reflection-like/dynamic behaviour, generated code or platform integration may require special configuration.
If one specific package works in debug and fails in release:
- Check the package documentation.
- Check its release-mode setup.
- Verify generated files.
- Check Android configuration.
- Test the latest compatible package version.
Don’t assume Flutter itself is the problem just because the failure appears in release mode.
20. Check Assets and File Names
An asset may work during development but fail after deployment because of an incorrect path or case mismatch.
Suppose your file is:
assets/images/Logo.pngbut your code references:
Image.asset('assets/images/logo.png');Case sensitivity can create unexpected behaviour across environments and tooling.
Also verify pubspec.yaml:
flutter:
  assets:
    - assets/images/
After changing assets, run:
flutter clean
flutter pub get
and rebuild.
21. Check Native Plugin Configuration
Flutter packages that integrate with Android often require native configuration.
Examples include:
- Google Maps
- Firebase
- Camera
- Location
- Notifications
- OAuth
- Payment SDKs
- Deep links
Installing the Dart package may not be enough.
Check whether the package requires changes to:
AndroidManifest.xml
build.gradle
proguard-rules.pro
google-services.json
or other Android resources.
Always review the package’s current Android installation instructions.
22. Check Android Permissions
Some features require runtime or manifest permissions.
Examples include:
- Camera
- Location
- Notifications
- Bluetooth
- Storage/media access
Don’t assume permissions are correct because the feature worked on one development device.
Test a clean installation of the release build on another device where permissions have never previously been granted.
23. Test a Clean Installation
Development devices accumulate state.
They may already contain:
- Old authentication tokens
- Granted permissions
- Cached data
- Previous Firebase tokens
- Old app configuration
Uninstall the app completely.
Then install the release build again.
This gives you a better approximation of a new user’s experience.
A clean-install test can expose initialization and permission problems that are hidden on your development device.
24. Check SharedPreferences and Secure Storage
If your app depends on stored configuration, verify what happens when no stored data exists.
Avoid code that assumes a value will always be available.
For example, instead of blindly expecting:
final token = prefs.getString('token')!;handle a missing token safely:
final token = prefs.getString('token');

if (token == null || token.isEmpty) {
  // Redirect to login or restore the session appropriately.
}
Release testing should include both:
Existing user with stored session
and:
Fresh installation with no session
25. Check App Initialization Order
Release mode can expose timing assumptions that weren’t obvious during development.
For example:
App starts
   ↓
Read token
   ↓
Initialize API client
   ↓
Validate session
   ↓
Load dashboard
If the dashboard starts loading before authentication initialization finishes, you may get:
Login → Dashboard → Unauthorized → Loginor other inconsistent navigation.
Make initialization explicit rather than depending on accidental timing.
26. Check Release-Only Crashes
If the application immediately closes, inspect device logs.
For Android, adb logcat can provide important information.
For example:
adb logcatYou can filter or inspect logs around the crash to identify native exceptions, plugin failures or Android configuration issues.
A release app that “just closes” usually leaves evidence in the device logs.
27. Don’t Depend Only on print()
Developers often rely heavily on:
print('API called');during debugging.
Production/release diagnostics need a more deliberate strategy.
For important production applications, consider appropriate crash/error monitoring and structured logging while avoiding sensitive customer data, credentials and authentication tokens.
The objective is to know:
What failed?
On which app version?
On which platform/device?
At which stage?
without exposing private information.
28. Check the App Version Being Tested
This sounds obvious, but it causes real confusion.
You fix a problem, build again, and then accidentally test an older APK.
Or Google Play still serves a different release track/version than expected.
Check:
version: 1.2.0+15in pubspec.yaml.
Understand:
- Version name
- Build number/version code
- Play Store release track
- Installed version
Make sure the device is actually running the build you think it is.
29. Run flutter doctor
Run:
flutter doctorFix relevant environment problems before assuming the application code is responsible.
Also check your Flutter version:
flutter --versionand dependency state:
flutter pub outdatedDon’t blindly upgrade every package on a production project, but know what environment you’re building with.
30. Clean and Rebuild the Project
Build caches can occasionally complicate troubleshooting.
A common controlled rebuild sequence is:
flutter clean
flutter pub get
flutter build apk --release
For an Android App Bundle:
flutter clean
flutter pub get
flutter build appbundle
This isn’t a universal solution, but it helps ensure you’re testing a fresh build after configuration changes.
A Real-World Example: API Works in Debug but Not Release
Suppose your Flutter app communicates with a Laravel API.
Debug login works.
The release APK shows:
Unable to connect to serverStep 1 — Check the production API URL
The release configuration contains:
http://192.168.1.5:8000/apiThat’s the developer’s local computer.
Step 2 — Replace it with production API
For example:
https://api.example.com/apiStep 3 — Verify HTTPS
The production SSL certificate is valid.
Step 4 — Rebuild
flutter clean
flutter pub get
flutter build apk --release
Now the release application can communicate with the production server.
The problem wasn’t Dio, Flutter or Laravel.
It was simply an environment-specific API URL.
A Real-World Example: Google Sign-In Fails After Play Store Release
Suppose:
Debug APK → Google Sign-In works
Local release APK → Google Sign-In works
Google Play version → Google Sign-In fails
This pattern immediately gives us useful information.
Step 1 — Compare signing certificates
The Google Play distributed build may be signed with the Google Play App Signing certificate.
Step 2 — Check the required fingerprint configuration
Verify the relevant SHA fingerprint from the Play Console against the Firebase/Google configuration used by the app.
Step 3 — Update configuration if required
Add the appropriate signing fingerprint and update the Android/Firebase configuration according to the service’s requirements.
The Flutter login code may require no change at all.
The difference is how the application is signed after distribution.
A Real-World Example: Login Works but Dashboard Returns to Login
Another common situation is:
Login
  ↓
API returns token
  ↓
Dashboard opens
  ↓
Dashboard API returns 401
  ↓
App redirects to Login
This can look like a navigation problem.
But the real question is:
Was the authentication token attached to the dashboard request?
Check:
- Token returned by login.
- Token stored successfully.
- Token available when API client initializes.
Authorization: Bearer ...attached.- Backend accepts the token.
- Session validation doesn’t clear the token prematurely.
Tracing the authentication lifecycle is more effective than repeatedly changing navigation code.
Flutter Release Mode Troubleshooting Checklist
When your Flutter app works in debug but not release, check:
- Release build tested locally
- Android internet permission
- Production API URL
- No localhost/local-network API
- HTTPS enabled
- SSL certificate valid
- Environment variables
--dart-definevalues- Dio/HTTP errors
- Authentication token storage
- Authorization headers
- Backend logs
- API redirects
- Firebase project configuration
- Package/application ID
- SHA-1/SHA-256 fingerprints
- Google Play App Signing
- Google Sign-In configuration
- FCM configuration
- Android release signing
- R8/ProGuard
- Asset paths
pubspec.yaml- Native plugin setup
- Android permissions
- Clean installation
- SharedPreferences/secure storage
- App initialization order
- Device crash logs
- App version/build number
- Flutter environment
- Fresh clean build
Don’t change five things at once.
Find the stage where debug and release behaviour becomes different.
How to Prevent Flutter Release Problems
Test Release Mode During Development
Don’t wait until your application is ready for Google Play.
Periodically run:
flutter run --releaseand create actual release builds.
Keep Development and Production Configuration Separate
Use a predictable configuration strategy for:
- API URLs
- Firebase
- Feature flags
- Payment environments
- OAuth
This reduces the chance of accidentally shipping development settings.
Use HTTPS From the Beginning
If your application will eventually communicate with a production API, configure proper HTTPS early.
This prevents last-minute Android network-security surprises.
Test Fresh Installations
Test your app as a completely new user.
Don’t rely only on a development phone that has months of cached application state.
Test Signed Builds
Features involving Firebase, OAuth or external SDKs should be tested using the relevant release signing configuration.
Monitor Backend Errors Too
Flutter is only one half of an API-driven mobile application.
When production fails, check both:
Flutter logs + Backend logsCreate a Release Checklist
Before uploading an AAB, verify:
Production API
HTTPS
App version
Firebase
Signing
Authentication
Notifications
Critical API calls
Login/logout
Fresh installation
Release build
A 10-minute checklist can prevent a failed production release.
Final Thoughts
When a Flutter app works in debug but not release mode, don’t immediately rewrite working Dart code.
First identify what changed between the two environments.
The problem is often somewhere in this chain:
Flutter Release Build
        ↓
Android Configuration
        ↓
Environment / API URL
        ↓
HTTPS / SSL
        ↓
Authentication
        ↓
Firebase / OAuth
        ↓
Signing
        ↓
Production Backend
Test the release build early, inspect the actual API response, check device and backend logs, and verify release-specific credentials and signing configuration.
Once you know exactly where the behaviour changes, the problem usually becomes much easier to solve.
Need Flutter App Help?
Need Help With a Flutter Release or API Integration?
KDP Infusion can help troubleshoot Flutter release builds, REST API integrations, authentication, Firebase configuration, Google Sign-In, notifications and Flutter applications connected to Laravel, WordPress or WooCommerce backends.
- Flutter application development
- API integration and troubleshooting
- Authentication and session issues
- Firebase and push notifications
- Android and iOS deployment support
Frequently Asked Questions
Debug and release builds differ in optimization, signing and runtime configuration. Production also commonly uses different APIs, Firebase/OAuth credentials and server environments. Check release-specific configuration rather than assuming the Dart code itself is broken.
Common causes include a localhost/local IP API URL, missing Android internet permission, HTTP instead of HTTPS, invalid SSL, incorrect environment configuration or authentication problems.
One common cause is signing-certificate configuration. Debug, local release and Google Play distributed builds may involve different certificates. Verify the relevant SHA fingerprints and Google/Firebase Android configuration.
Check the Android package name, Firebase project, signing fingerprints, google-services.json and the specific Firebase service's release requirements.
It can affect some native Android dependencies when shrinking/obfuscation is enabled and required keep rules are missing. Check the affected package's Android release documentation before changing optimization settings.
Verify that the login token is stored, retrieved and attached to production API requests. Also check backend logs and confirm the token is valid for the production environment.
Yes. Test release behaviour before production distribution, and also test through an appropriate Play testing track because Google Play distribution/signing can introduce differences that a locally installed APK doesn't reproduce.
It isn't necessary as a universal rule, but a clean rebuild is useful after significant dependency, native configuration or environment changes and while diagnosing suspicious build-state issues.